4 ANSWERS ABOUT USING INDICATORS AND MONITORING YOUR STATIM
Thousands of dental offices and dozens of jurisdictions means each dental team will have a variation on the process it follows to sterilise instruments in accordance with AS/NZS 4815. What they all have in common is a need to verify the process is working.
If you’re using a STATIM cassette steriliser, things are a little simpler. Since it’s an S Cycle steriliser using steam flush pressure pulses, you will only need to follow two simple steps: First, check cycle data to confirm that the unit is functioning correctly. Second, make sure to use chemical indicators to show a pass result. This will validate that your load has been exposed to the sterilisation temperature of the cycle you selected (either 121oC or 134oC, as per the instrument manufacturer’s instructions). It’s generally straight forward, but of course, the questions are in the details. Let’s start with physical monitoring.
If STATIM has sensors and software that precisely control each cycle, why do I need to check the cycle record?
Most modern autoclaves now have software using multiple sensors to govern every process. That means every parameter of temperature and pressure – from conditioning, to sterilising to drying – is tracked and recorded. In fact, if anything is even a bit off at any stage, the unit will stop the cycle to declare a faulty condition.
It can simply be that a door seal is leaking but whatever the cause, it’s important to note that if you have a modern steriliser like a STATIM, physical monitoring is done by the machine. In fact, on STATIMs, G4 technology stores the records to the unit, to a USB (if inserted) as well as to the MyColtene cloud service (if your unit is registered). Every dental office must maintain a sterilisation cycle logbook that states who checked the cycle parameters, unloaded the STATIM, and determined that the sterilised load was suitable for use. The process of checking and recording a steriliser’s cycle parameters to validate sterility before releasing the instruments for use is known as parametric release.
Which type of Chemical Indicator should I use?
You need a Class 1 chemical indicator (CI) on the outer surface of every individual pack of wrapped or pouched instruments or inside every unwrapped load. Type 1 CIs will change colour when they are exposed to the required sterilisation temperature. These can be found integrated on sterilisation pouches or applied to wrapped loads in the form of sterilisation tape. For unwrapped loads, you can use a Class 1 CI strip.
You may also find yourself needing to use Type 4, 5 or 6 CIs, all of which are used to measure not only temperature but also time of exposure at that temperature. Type 5 and 6 CIs also detect the presence of steam. Each has a different level of precision when it comes to measuring temperature and exposure time. Unlike Type 1 CIs that are placed on the outer area of wrapped packs, Type 4, 5 and 6 CIs must either be placed inside wrapped packs along with the instruments being sterilised or be loose in the chamber for unwrapped loads.
These last three chemical indicator types are important because you may need them in certain circumstances. For example, you may have a new unit, or a loaner and your technician hasn’t yet completed the full qualification process using biological indicators. If that’s the case, you can still run loads in the steriliser if you use a Type 4 or higher indicator in each pack (or a single test on the rack if running an unwrapped load). When changing to new packaging materials, you’ll also need to verify your steriliser, but here again you can use a Type 4 or higher with every load until a technician completes a qualification process using the new packaging materials.
How often do I need to use the Helix test that came with my STATIM?
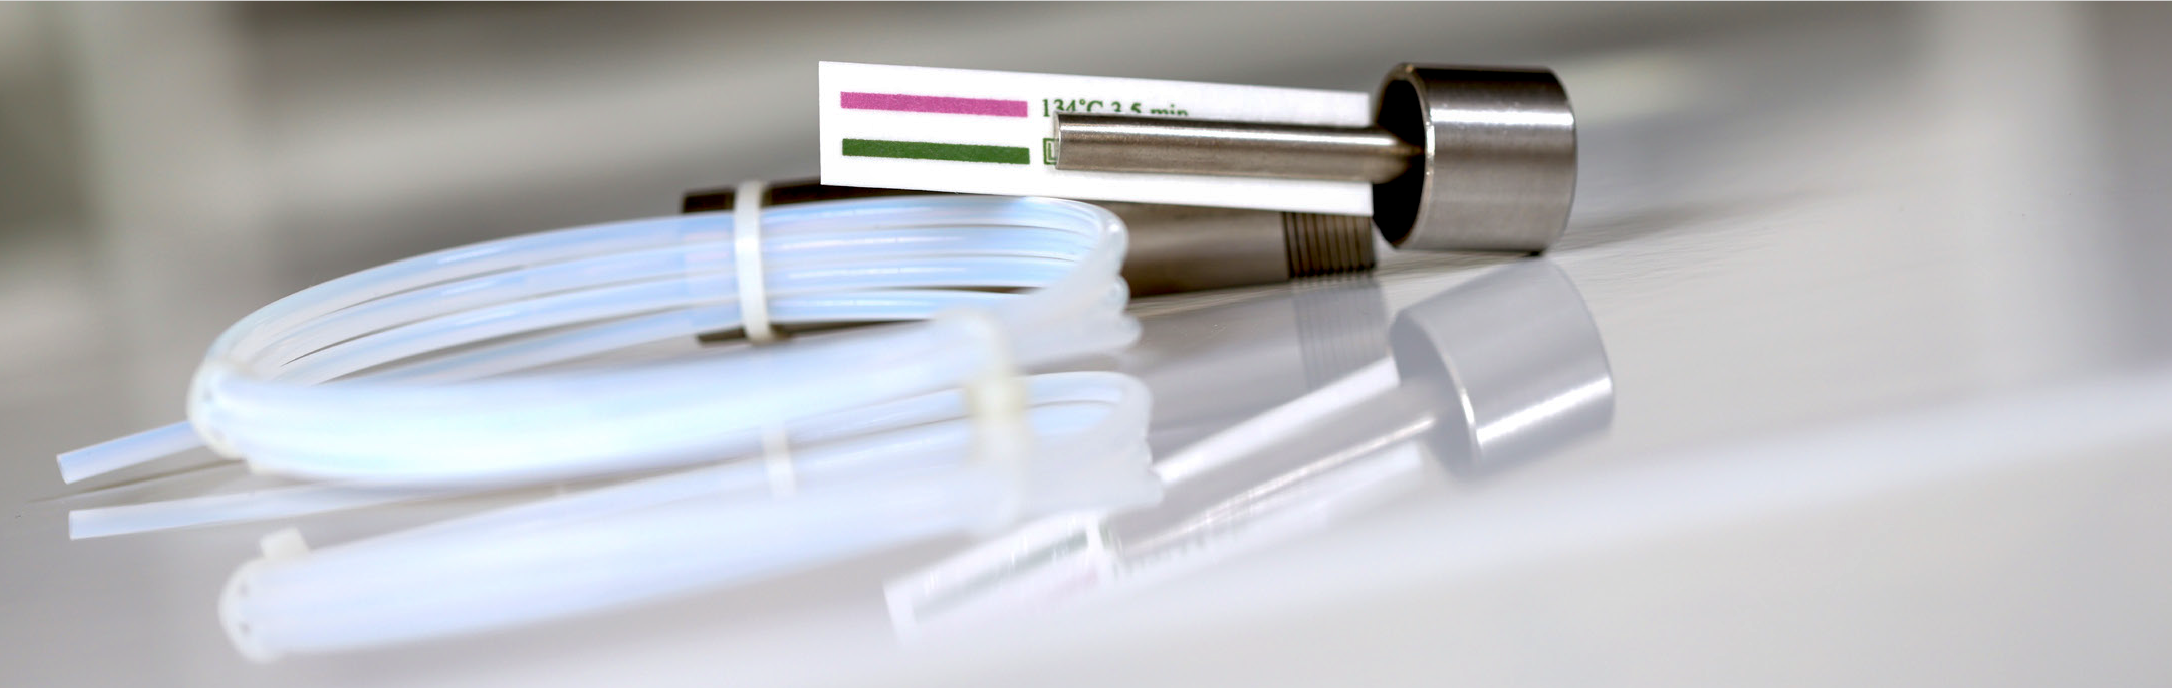
In accordance with the 2006 European guidelines, STATIMs sold in Australia, New Zealand, Europe and other regions, come equipped with Helix PCD tests along with compatible Type 6 chemical indicators. This test checks the ability of your STATIM to penetrate hollow spaces.
STATIM doesn’t use a vacuum to reach the inside of handpieces. Instead, it achieves similar steam penetration using steam flush pressure pulses (SFPP) where the air is actively removed from the cassette through pressurisations and flushes with steam. Using a Helix PCD test can provide peace of mind that hollow instruments, such as handpieces, are being sterilised internally and externally.
What should I know about using biological indicators?
Biological indicators – those tiny vials in which bacterial spores are suspended in a growth medium – are not dangerous. They use a type of heat-resistant spore that is difficult to kill and not harmful to humans, two qualities that make it ideal for testing sterilisers. Used spore tests (including any that show growth) should be discarded with the sharps waste.
Once a year, after your technician has completed the annual maintenance and calibration, they must perform a validation of cycle parameters. For a STATIM, this involves placing three BI vials in a pouch, arranging them one on each end and one in the middle, then running a cycle. This is done two more times so that the technician finishes with 9 BIs. The 9 processed vials are incubated along with one control vial and checked for growth. A correctly calibrated and functioning STATIM will inactivate each of the 9 BIs that were processed so that there is no indication of spore germination.
Sterility assurance is easy with a steriliser that does all the monitoring for you. With the proper packaging, the appropriate chemical indicators, and the right office procedures, it’s easy to remain compliant and efficient. For superior record-keeping security, sign up to MyColtene.com to automatically back up all your STATIM’s cycle data, access product training videos and register your warranty. And to learn more about SciCan ENSURE products for your practice, contact your Henry Schein Territory Manager.


Reference
Australian Dental Association, 2021, Guidelines for Infection Prevention and Control Fourth Edition, accessed 29 May 2023,
Are you thinking about setting up a new Dental Practice or renovating and redesigning your existing clinic? Check out Henry Schein’s Surgery Setup website for a range of resources and information to help you get sorted.
Be sure to keep an eye on Henry Schein’s Dental Education Hub for related events, courses, and information.